- Request a microdeposit verification when an end user searches for an institution that doesn’t support Instant Account Verification.
- Prompt the end user to verify their deposit amounts.
1. Requesting Workflow
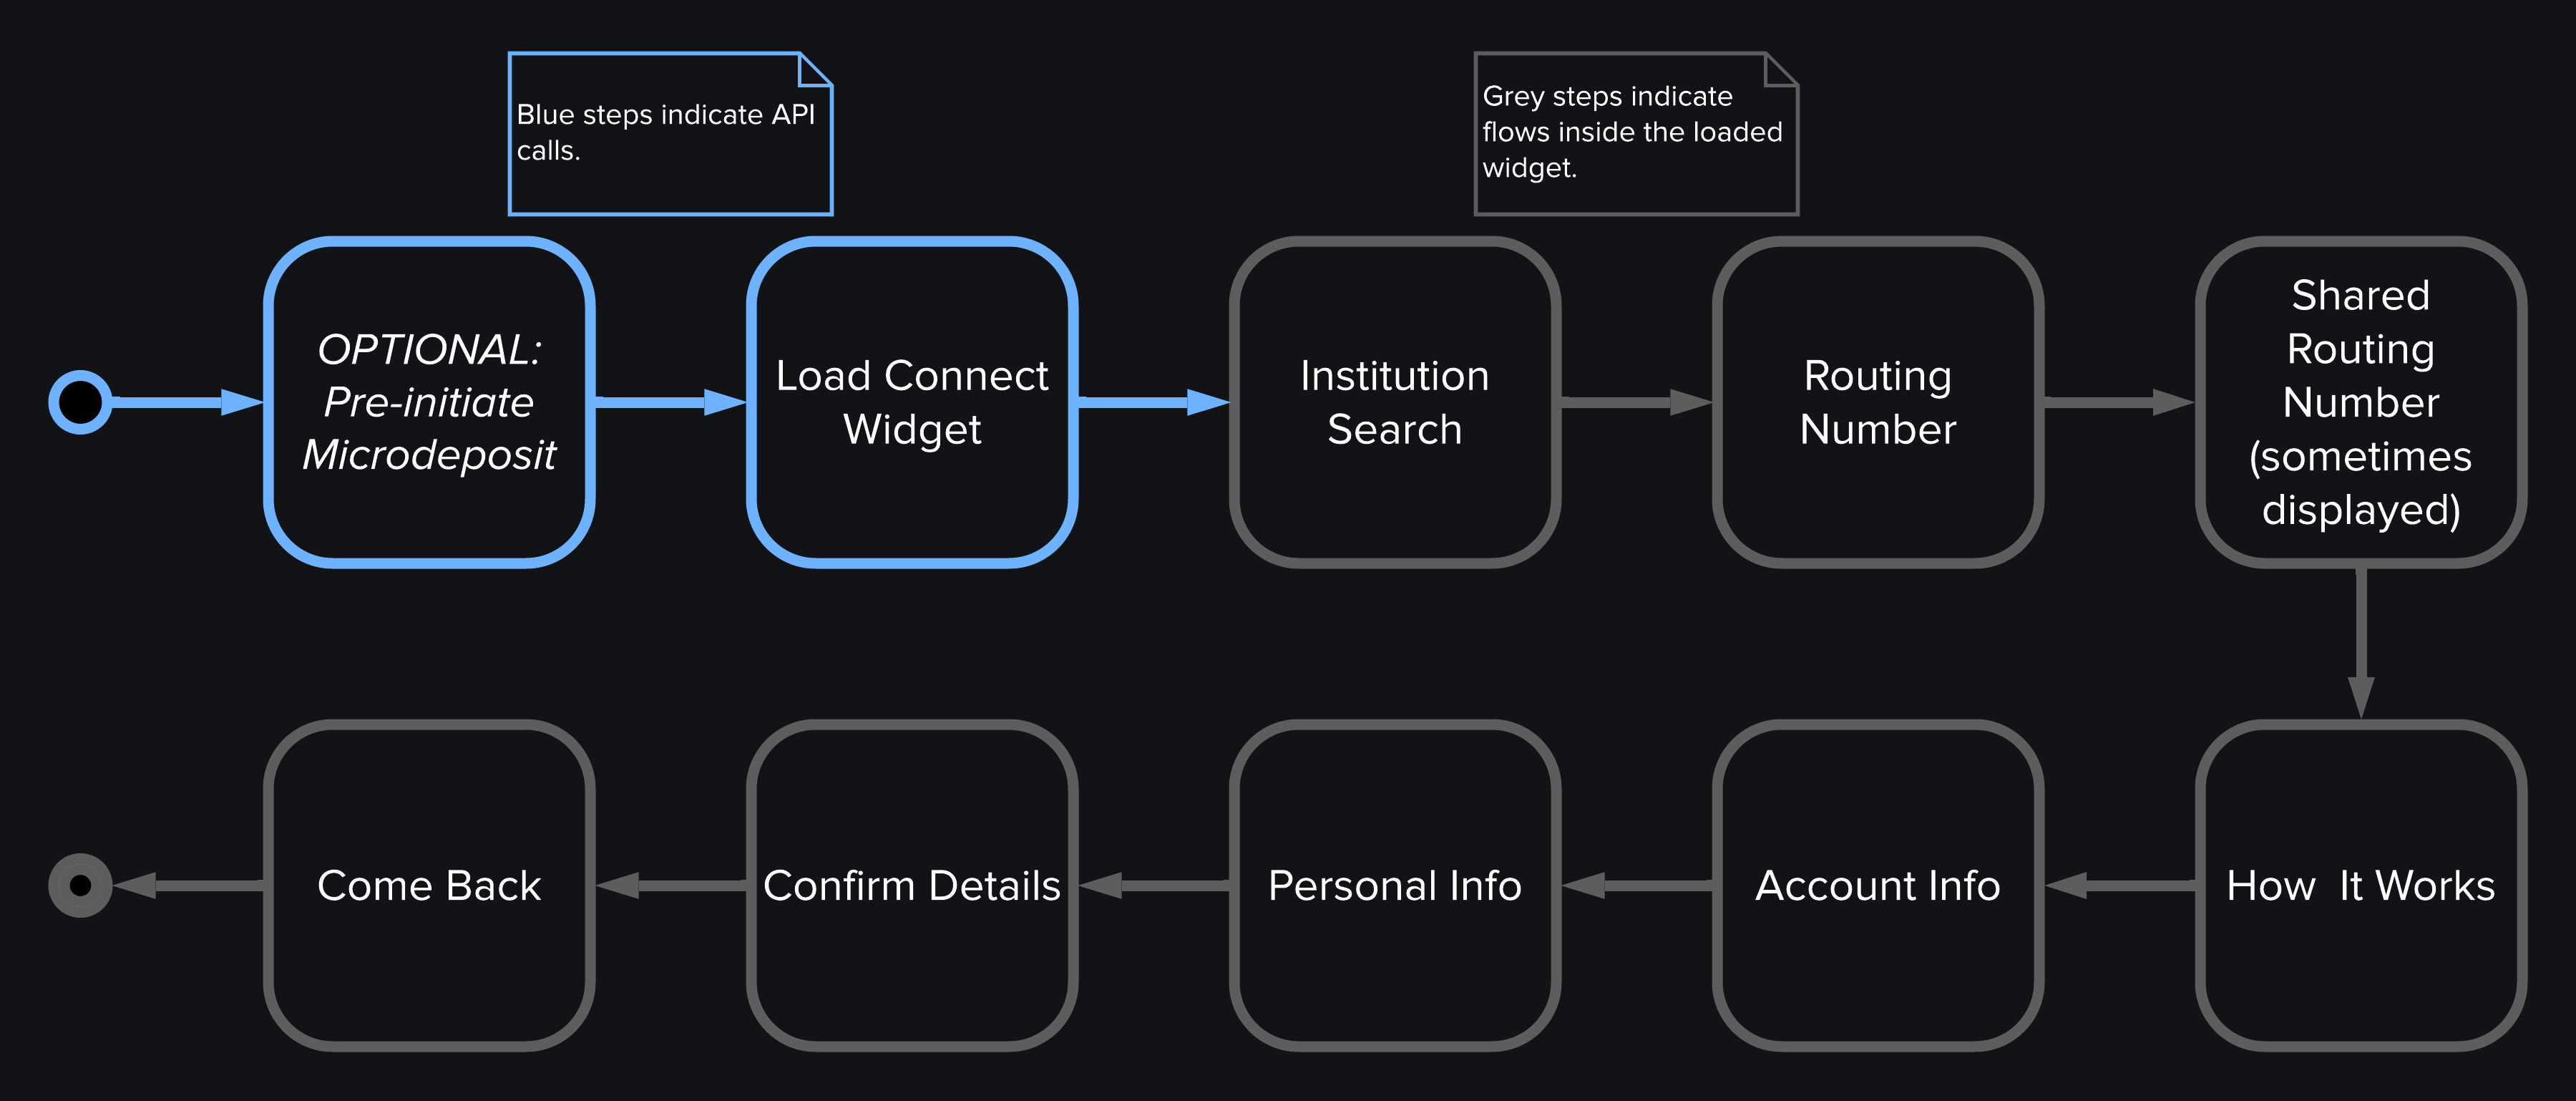
- Request a Widget URL with
widget_typeset toconnect_widgetanddata_request.productsset to includeaccount_verification. - The widget loads, which triggers the Connect Loaded widget event.
- End user searches for an institution (which triggers the Institution Search widget event) then selects an institution (which triggers the Institution Selected widget event).
- The institution the end user selected doesn’t support instant account verification. The end user then selects the option to verify using account numbers, which triggers the Microdeposit Flow Loaded widget event.
- Routing number: If the user enters a blocked routing number, the Blocked Routing Number widget event is triggered. Depending on the reason given in the event, the verification process either can’t proceed or the widget will suggest the end user follows the instant account verification flow.
- Account information: Such as account type and number.
- Account holder information: Such as first name, last name, and email.
- End user reviews and confirms what they entered.
- Account Details Submitted widget event triggers, containing a
microdeposit_guidin themetadata. You must save thismicrodeposit_guid, since you’ll use it when the end user returns to verify their deposit amounts. - Widget informs the end user to check back soon after they see two small deposits in their account to confirm those amounts. When the end user selects the primary button on this screen, the Microdeposit Come Back, Primary Action Selected widget event is triggered.
NOTEIn the microdeposit flow, no
member is created.2. Verifying Workflow
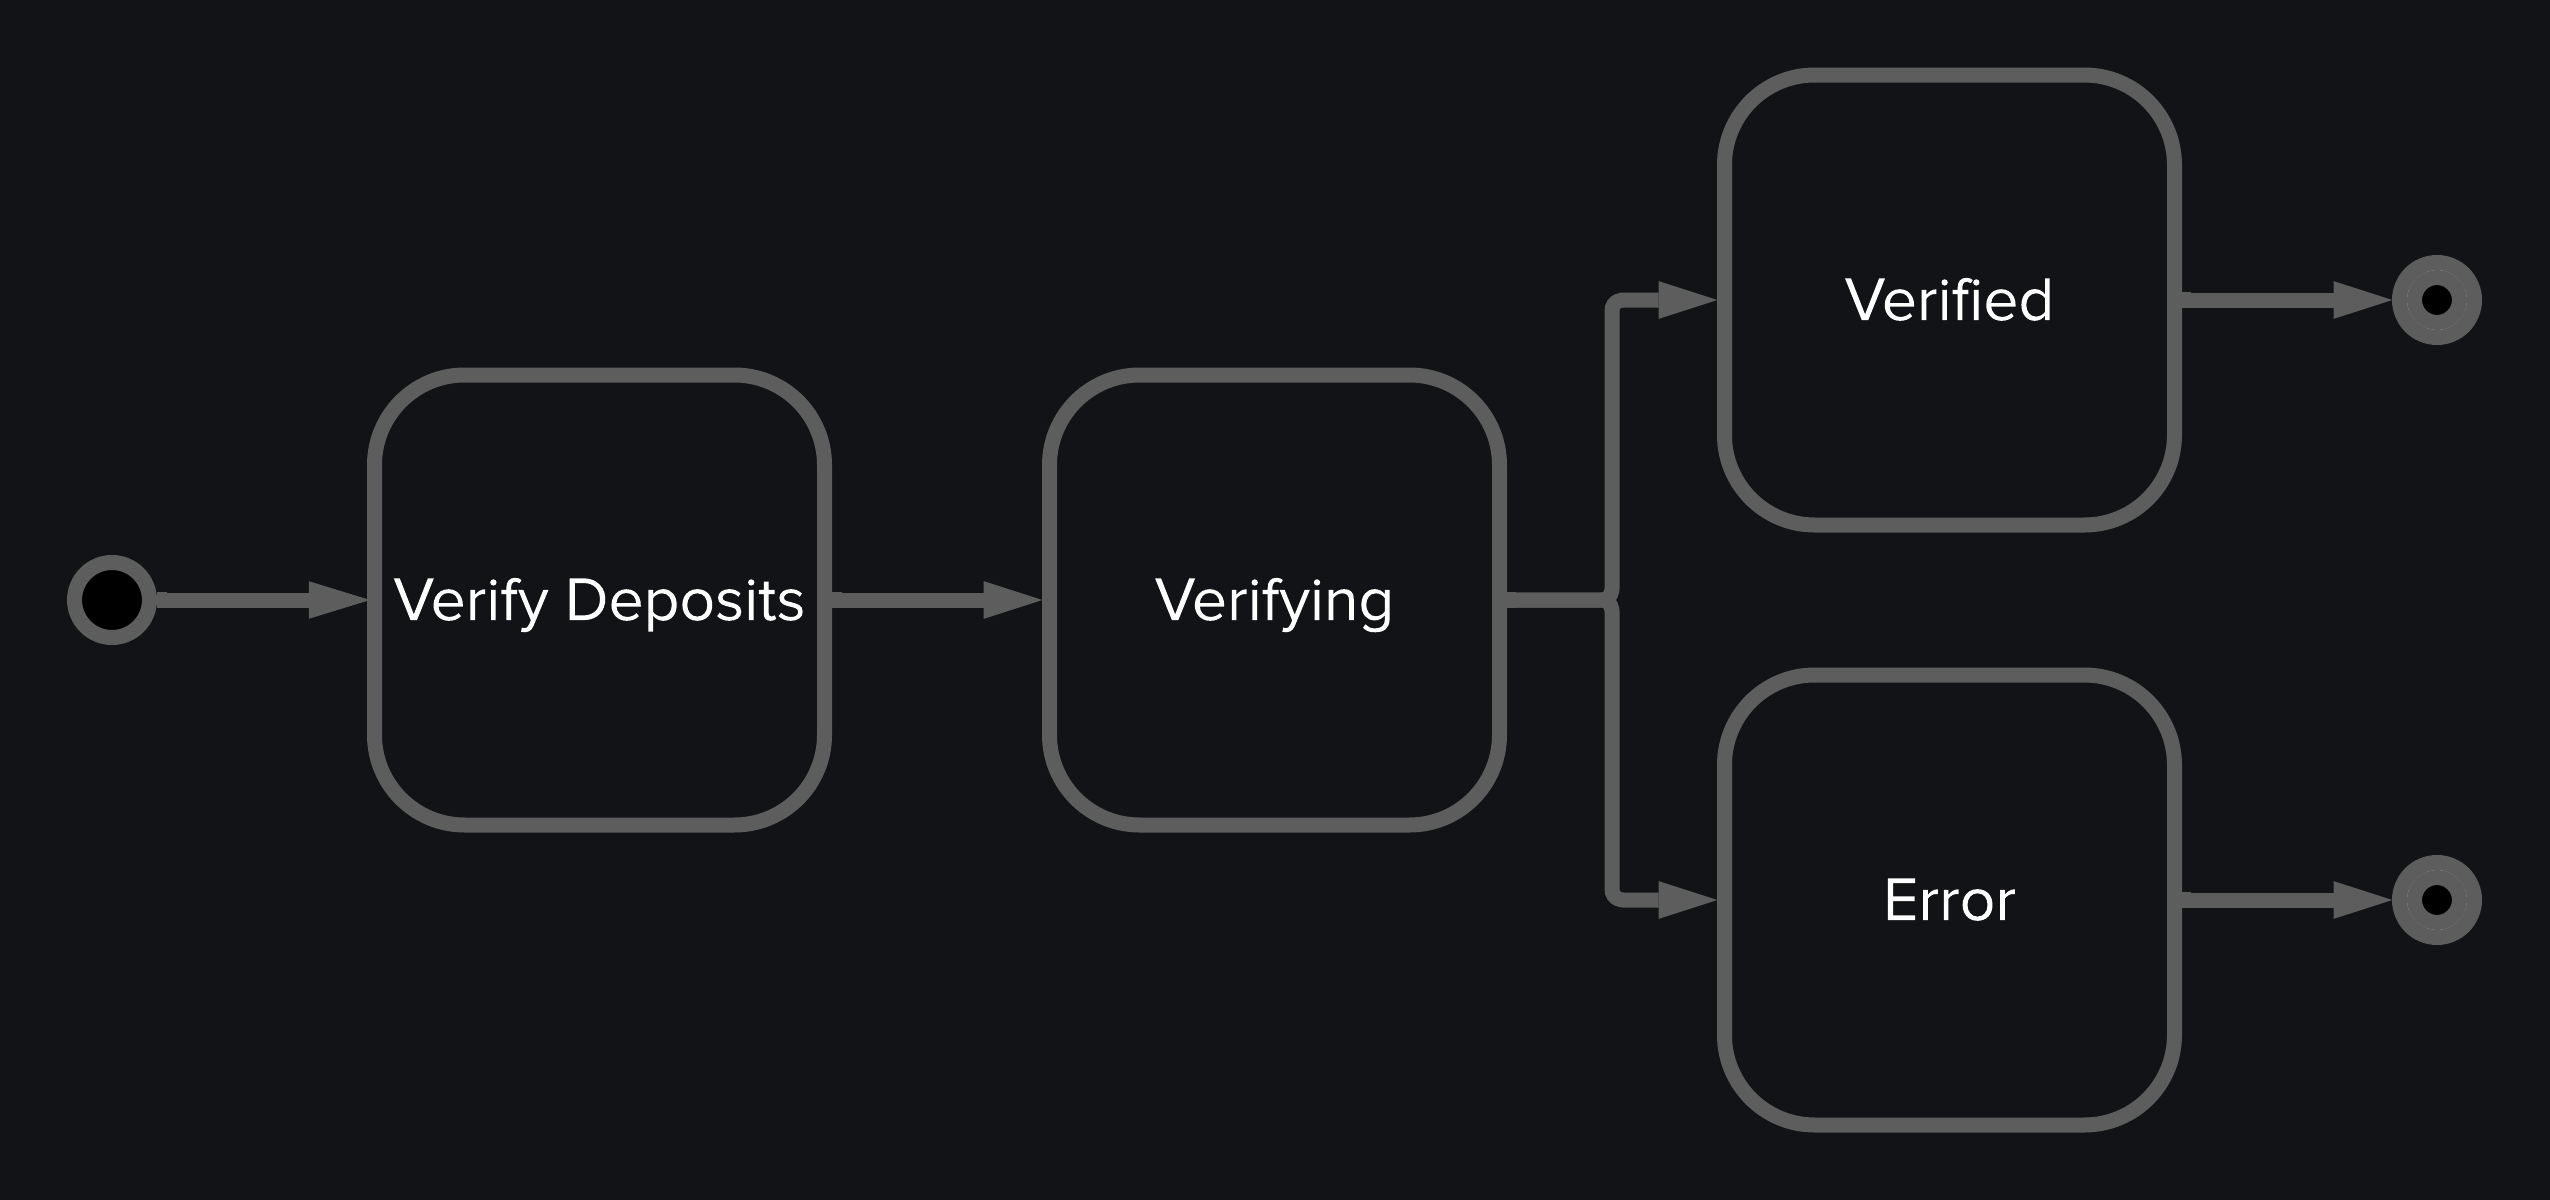
- Wait at least 36 hours after creating a microdeposit, then begin polling the Read a Microdeposit endpoint at an interval of 15 minutes until its
statusis eitherDEPOSITEDorERRORED. Starting at 36 hours ensures deposits have been processed, though you can begin polling before this time if needed. - Once the
statusisDEPOSITED, load the Connect Widget. Setdata_request.productsto includeaccount_verificationandcurrent_microdeposit_guidto themicrodeposit_guidyou captured from the Account Details Submitted widget event. - The end user will then enter the two small deposit amounts.
- Incorrect Amounts: If the amounts are entered incorrectly, the widget will display an error. The end user can reenter the amounts or select the primary button on this screen, which triggers the Microdeposit Error, Primary Action Selected widget event. You must listen for this event, close the widget, and delete the
microdeposit_guidby calling the Delete a Microdeposit endpoint. - Correct Amounts: If the amounts are entered correctly, the Microdeposit Verified widget event is triggered. The end user will see a Verified screen and then select Confirm. This action triggers the Microdeposit Verified, Primary Action Selected widget event, signaling that you can now safely close the widget and delete the
microdeposit_guidusing the Delete a Microdeposit endpoint.
- Incorrect Amounts: If the amounts are entered incorrectly, the widget will display an error. The end user can reenter the amounts or select the primary button on this screen, which triggers the Microdeposit Error, Primary Action Selected widget event. You must listen for this event, close the widget, and delete the
SUCCESSYou built a flow to let end users verify their accounts using microdeposits.