

Add an Institution
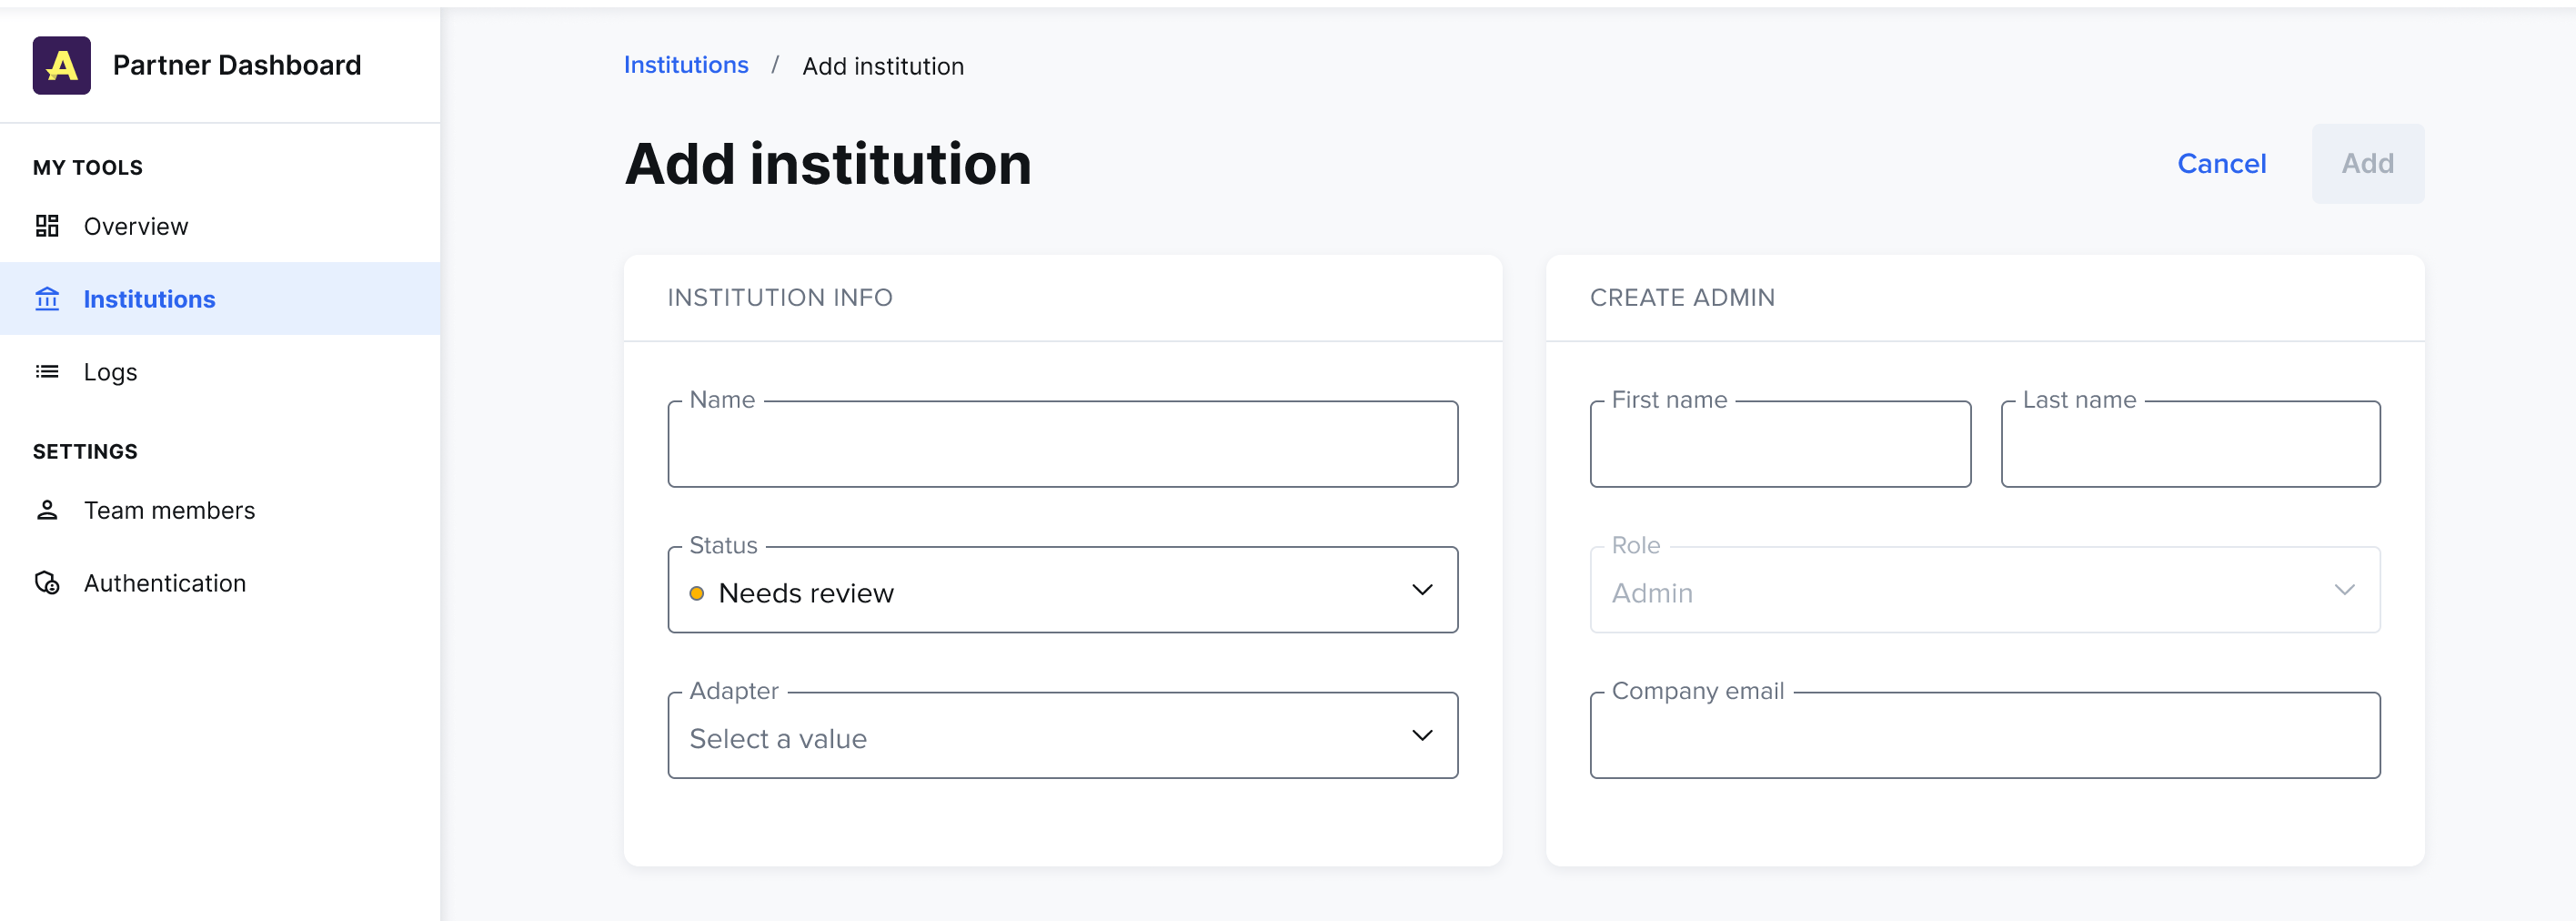
To add an institution:- Select + Add.
- Enter a name for the institution.
-
Adjust the institution’s status, if needed.
- When set to Enabled, all API requests received by the institution will be accepted.
- When set to Disabled, all API requests received by this institution will be rejected.
- When set to Needs review, all API requests received by this Institution will be rejected and notes that details about this institution must be reviewed before enabling.
- Create the institution’s first admin user by entering the first name, last name, and company email of the person at the institution who will primarily manage their instance of Data Access.
- When all inputs are filled, select Add.
Edit an Institution
You can edit the following institution details:- Institution name: This is the name of institution inside the Channel Partner Portal.
-
Status: This determines the status of the institution’s API.
- When set to Enabled, all API requests received by the institution will be accepted.
- When set to Disabled, all API requests received by this institution will be rejected.
- When set to Needs review, all API requests received by this institution will be rejected and notes that details about this institution must be reviewed before enabling.
The Institution’s Public ID
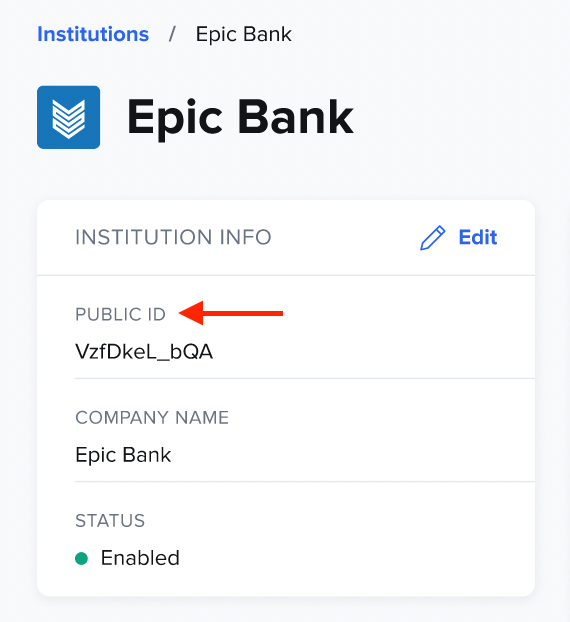
When viewing an institution’s details, you’ll see the public ID in the Institution info column. This is a unique public identifier used during initial testing and configuration. It allows admins to access their Data Provider Portal before DNS records have been added. For example, the admin would visit/institutions/{public_id}/admin. After DNS records have been added, this route would be epic-bank.com/admin.
Intermediaries
Intermediaries are data recipients who register apps to consume the APIs of your institutions. From the institution details page, you can access a table of all intermediaries that have been added to the associated institution. This table shows the status of the intermediary and how many apps are registered with it.Add an Intermediary
MX recommends that the institution add and manage all intermediaries from their own Data Provider Portal. However, if needed, channel partner admins can create intermediaries on their behalf. To add an intermediary:- Select the institution you want to add an intermediary to.
- Select +Add.
-
Enter the following info about the intermediary:
- Logo
- Name
-
Adjust the intermediary’s status if needed.
- When set to Enabled, all API requests flow freely to this intermediary and their registered apps.
- When set to Disabled, all API requests from this intermediary and their registered apps will be rejected.
- When set to Needs review, all API requests from this intermediary will be rejected, and notes that the intermediary’s apps and settings need to be reviewed before enabling.
- The website, support email, support phone, address, city, state, and zip fields are optional. These fields help other team members identify the intermediary and who to contact if support is needed.
-
Set a request limit and frequency.
- If the intermediary exceeds the request limit, any more requests will be blocked. If you don’t want to set a request limit, select the Disable request limit checkbox.
- Tip: A request is counted each time one of the FDX endpoints is hit. For example,
GET /accountswould be one request.
- Select whether any new apps that are registered with the intermediary are auto-approved or not. If this is set to manual, the data provider admin will have to manually enable each newly registered app.
-
Enter the IP addresses for the intermediary.
- You can add multiple addresses if needed.
- When the form is complete, select Add.
Rotate App Registration Keys
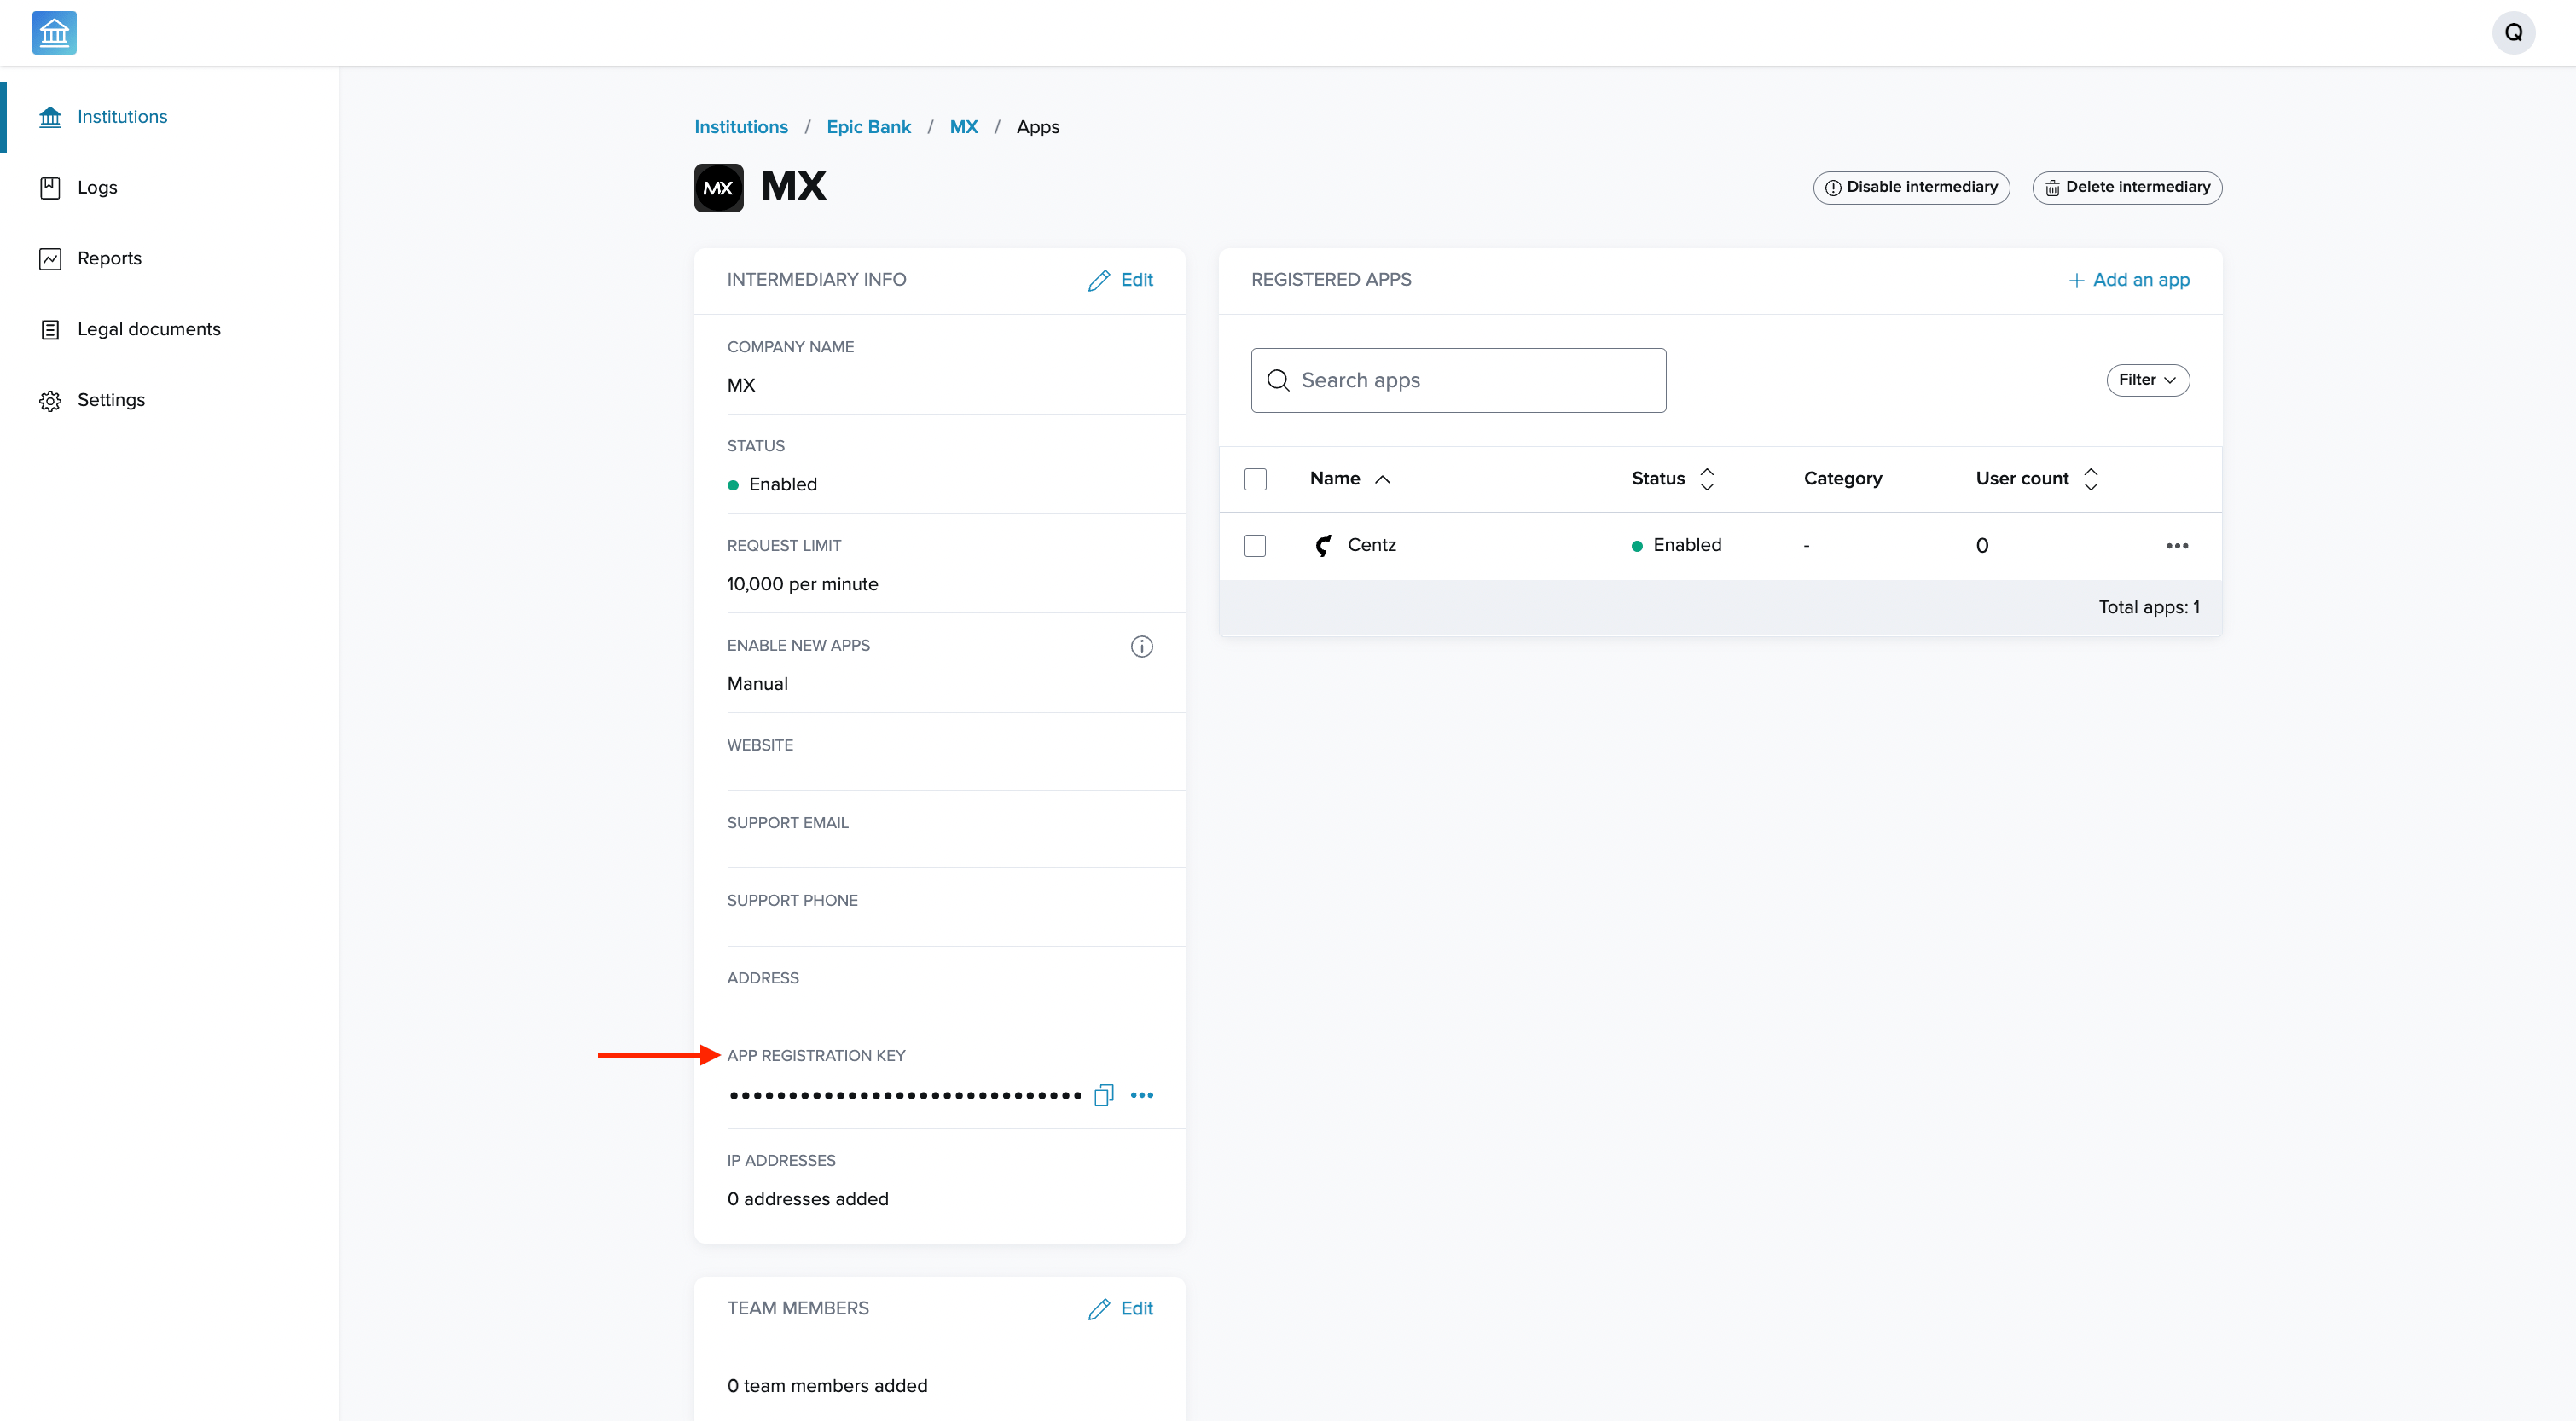
If an intermediary’s app registration key is compromised, or if your security and compliance team requires these keys be rotated regularly:- Select •••.
- Select Rotate key.
Disable an Intermediary
If an intermediary’s status is set to Disabled, all requests that come from any app registered with it will be rejected and a 429 HTTP status code will be returned. To disable an intermediary:- Select the intermediary you want to disable.
- Select Disable.
Enable an Intermediary
If an intermediary’s status is set to Enabled, all API requests that come from that intermediary and its registered apps will be accepted. To enable an intermediary:- Select the intermediary you want to enable.
- Select Enable.
Delete an Intermediary
Deleting an intermediary will also delete all of the apps that are registered with it. It will also be removed from the intermediaries table. Any more requests that come from the deleted intermediary will be rejected. This can’t be undone. To delete an intermediary:- Select the intermediary you want to delete.
- Select Delete.
- Select Yes, delete from the confirmation modal.
Apps
From an intermediary’s details page, you can access a table of all of the apps that have been added to that intermediary. In the table you’ll find the app’s status, category, and unique user count. You can select an app to view important details, such as the app’s:- Status (enabled, disabled, needs review)
- Redirect URI
- Client ID and client secret
- Category
- Logs
Add an App
- Select the institution you want to add the app to.
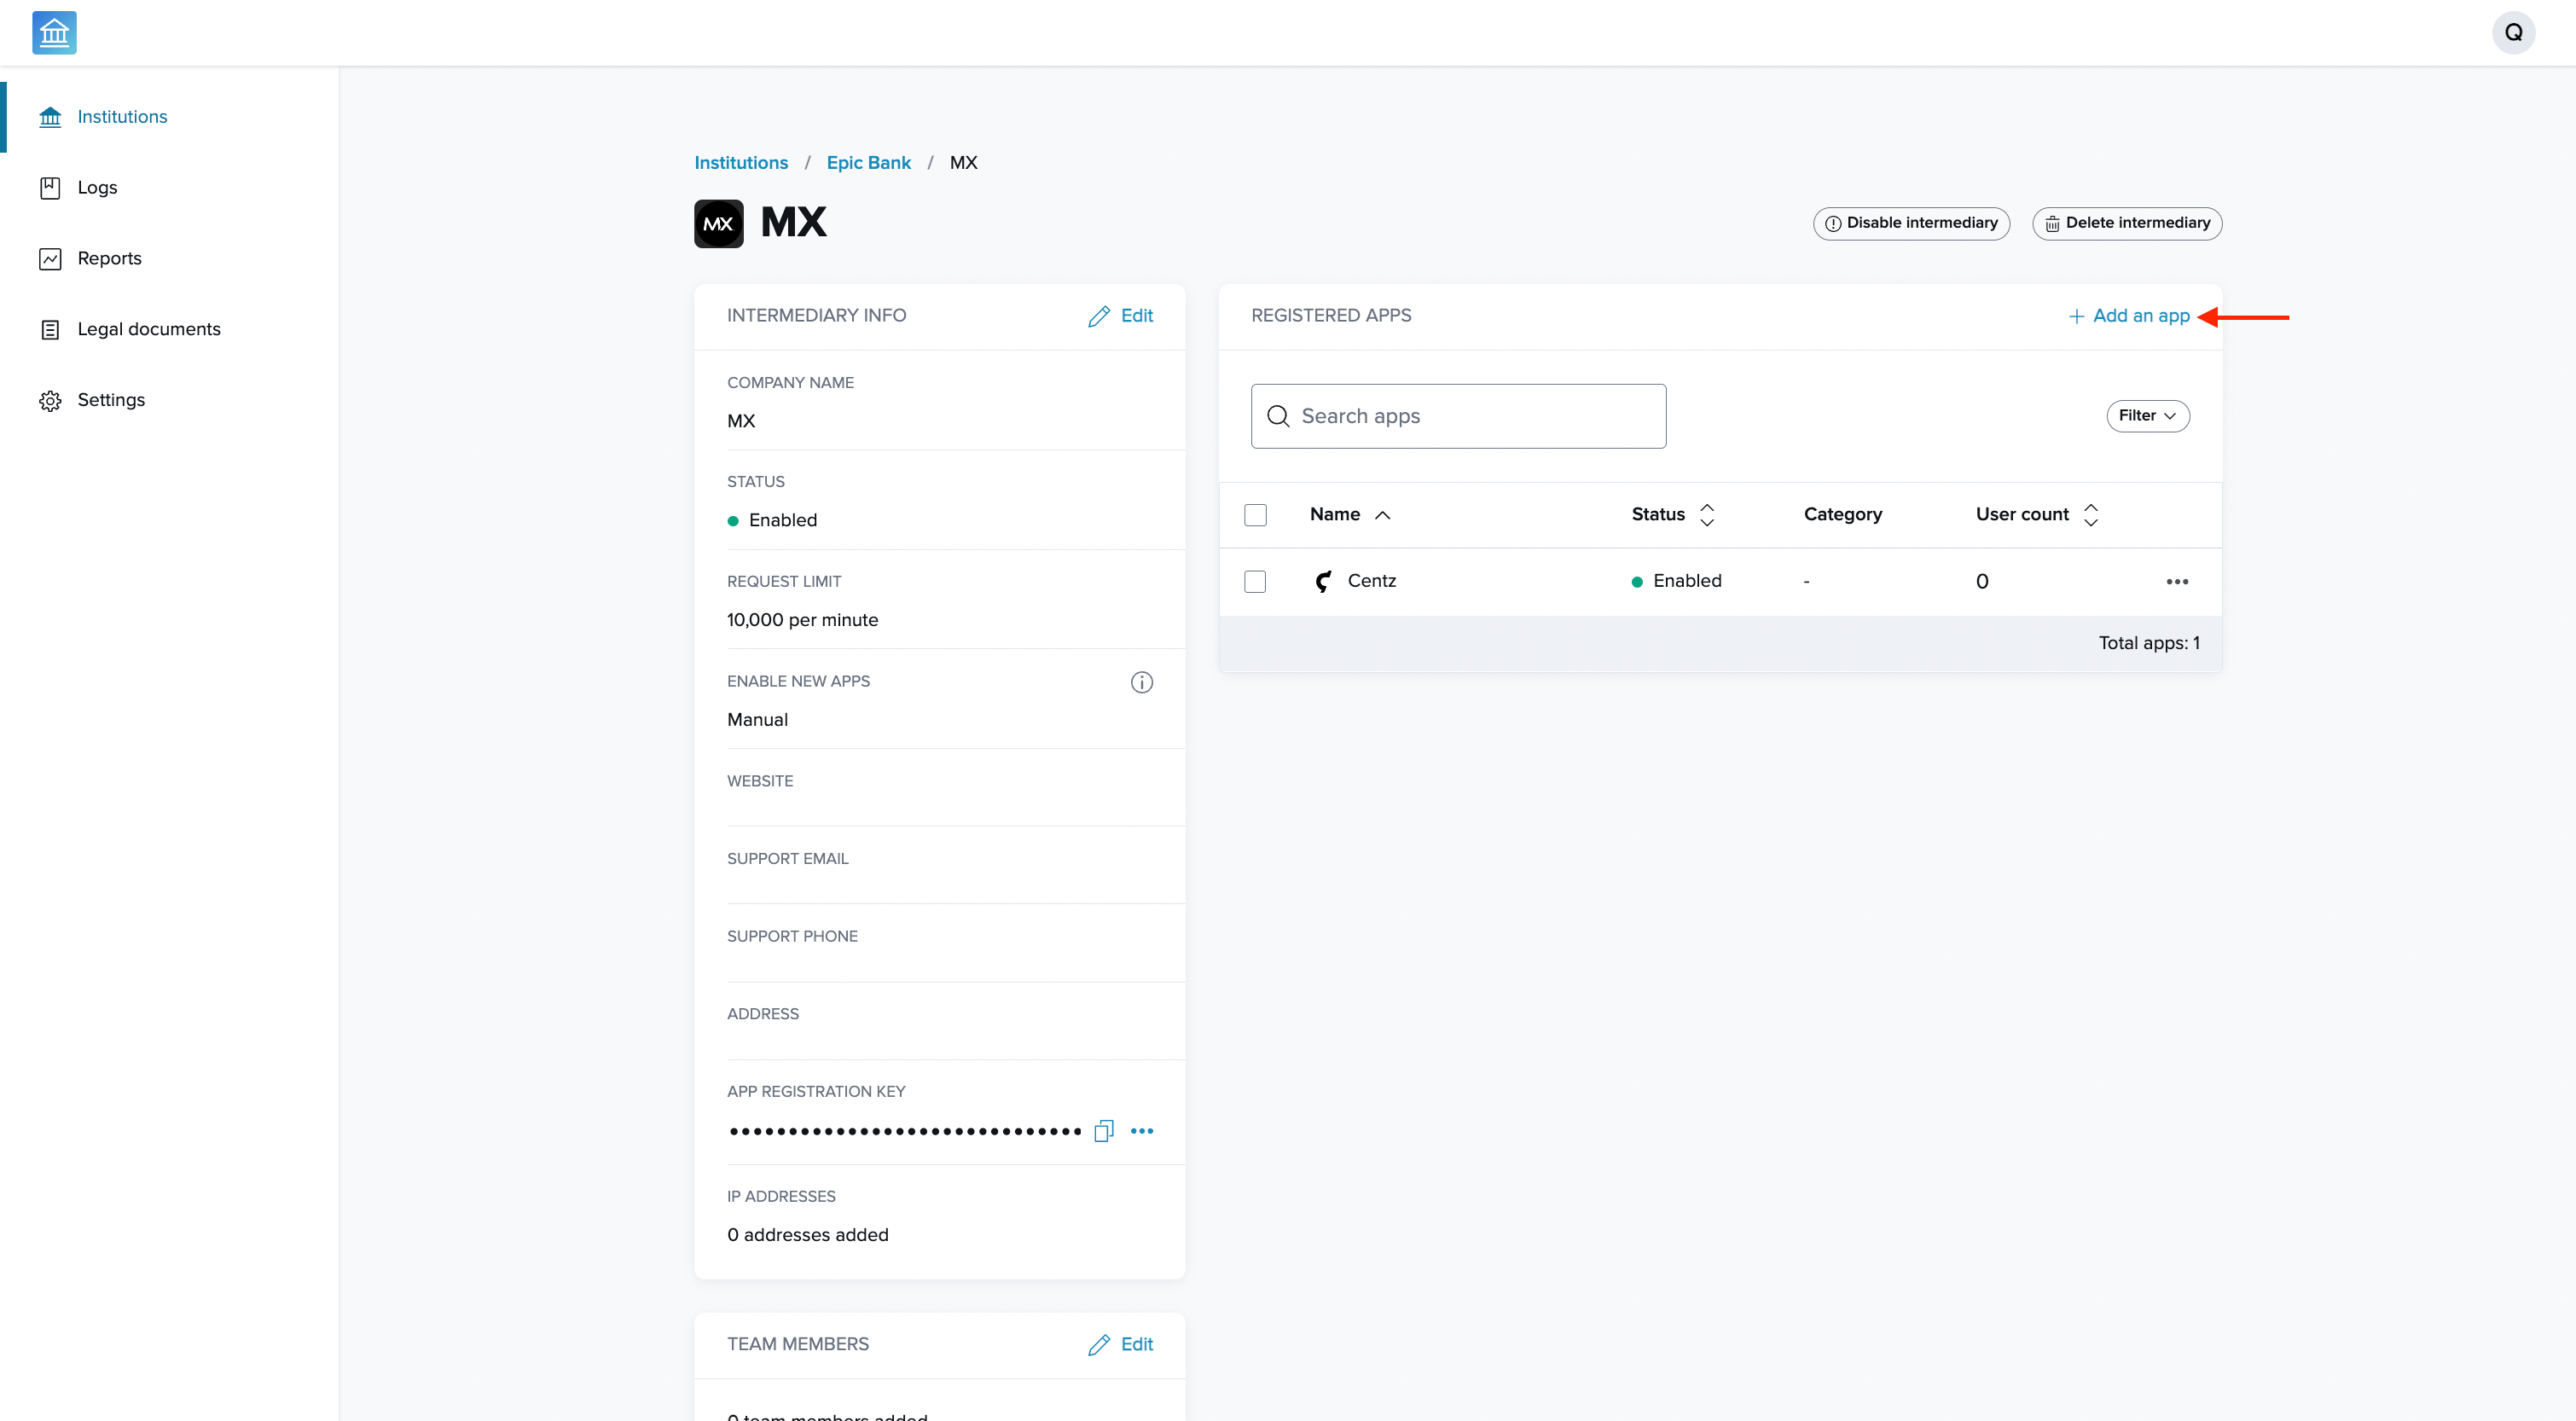
- From the institution details page, select the intermediary you want to add the app to.
- Select +Add.
- Enter the name of the app.
- Adjust the status if needed.
- Enter the redirect URI (you must get this from the intermediary or app).
- Select an app category. Choose from the existing categories or create a new one.
- When the form is complete, select Save.
Disable an App
If an app’s status is set to Disabled, all API requests that come from that app will be rejected. To disable an app:- Select the app you want to disable.
- Select Disable.
Enable an App
If an app’s status is set to Enabled, all API requests that come from that app will be accepted. To enable an app:- Select the app you want to enable.
- Select Enable.
Delete an App
After an app is deleted, it will be removed from the table and any more request that comes from it will be rejected. To delete an app:- Select the app you want to delete.
- Select Delete.
- Select Yes, delete from the confirmation modal.
Team Members
Channel partner admins have full access to manage an institution’s team members. This feature controls who has access to the institution’s Data Provider Portal and what level of access (admin vs. user). Institution admins have full edit access to all features of the Data Provider Portal, whereas users have read-only access. Channel partner admins can create, edit, or remove institution users. When a new institution user is added, they’ll receive an automated email inviting them to log in.Settings
Institution admins are responsible for configuring the settings outlined here from their own Data Provider Portal. However, channel partner admins have full access to configure an institution’s settings if necessary. These settings include:- Authentication
- Tokens
- Adapter
- Theme
Authentication
The authentication section has five expandable subsections.Consent Management Dashboard
This is the shared secret needed to embed the Consent Management Dashboard.Public URL
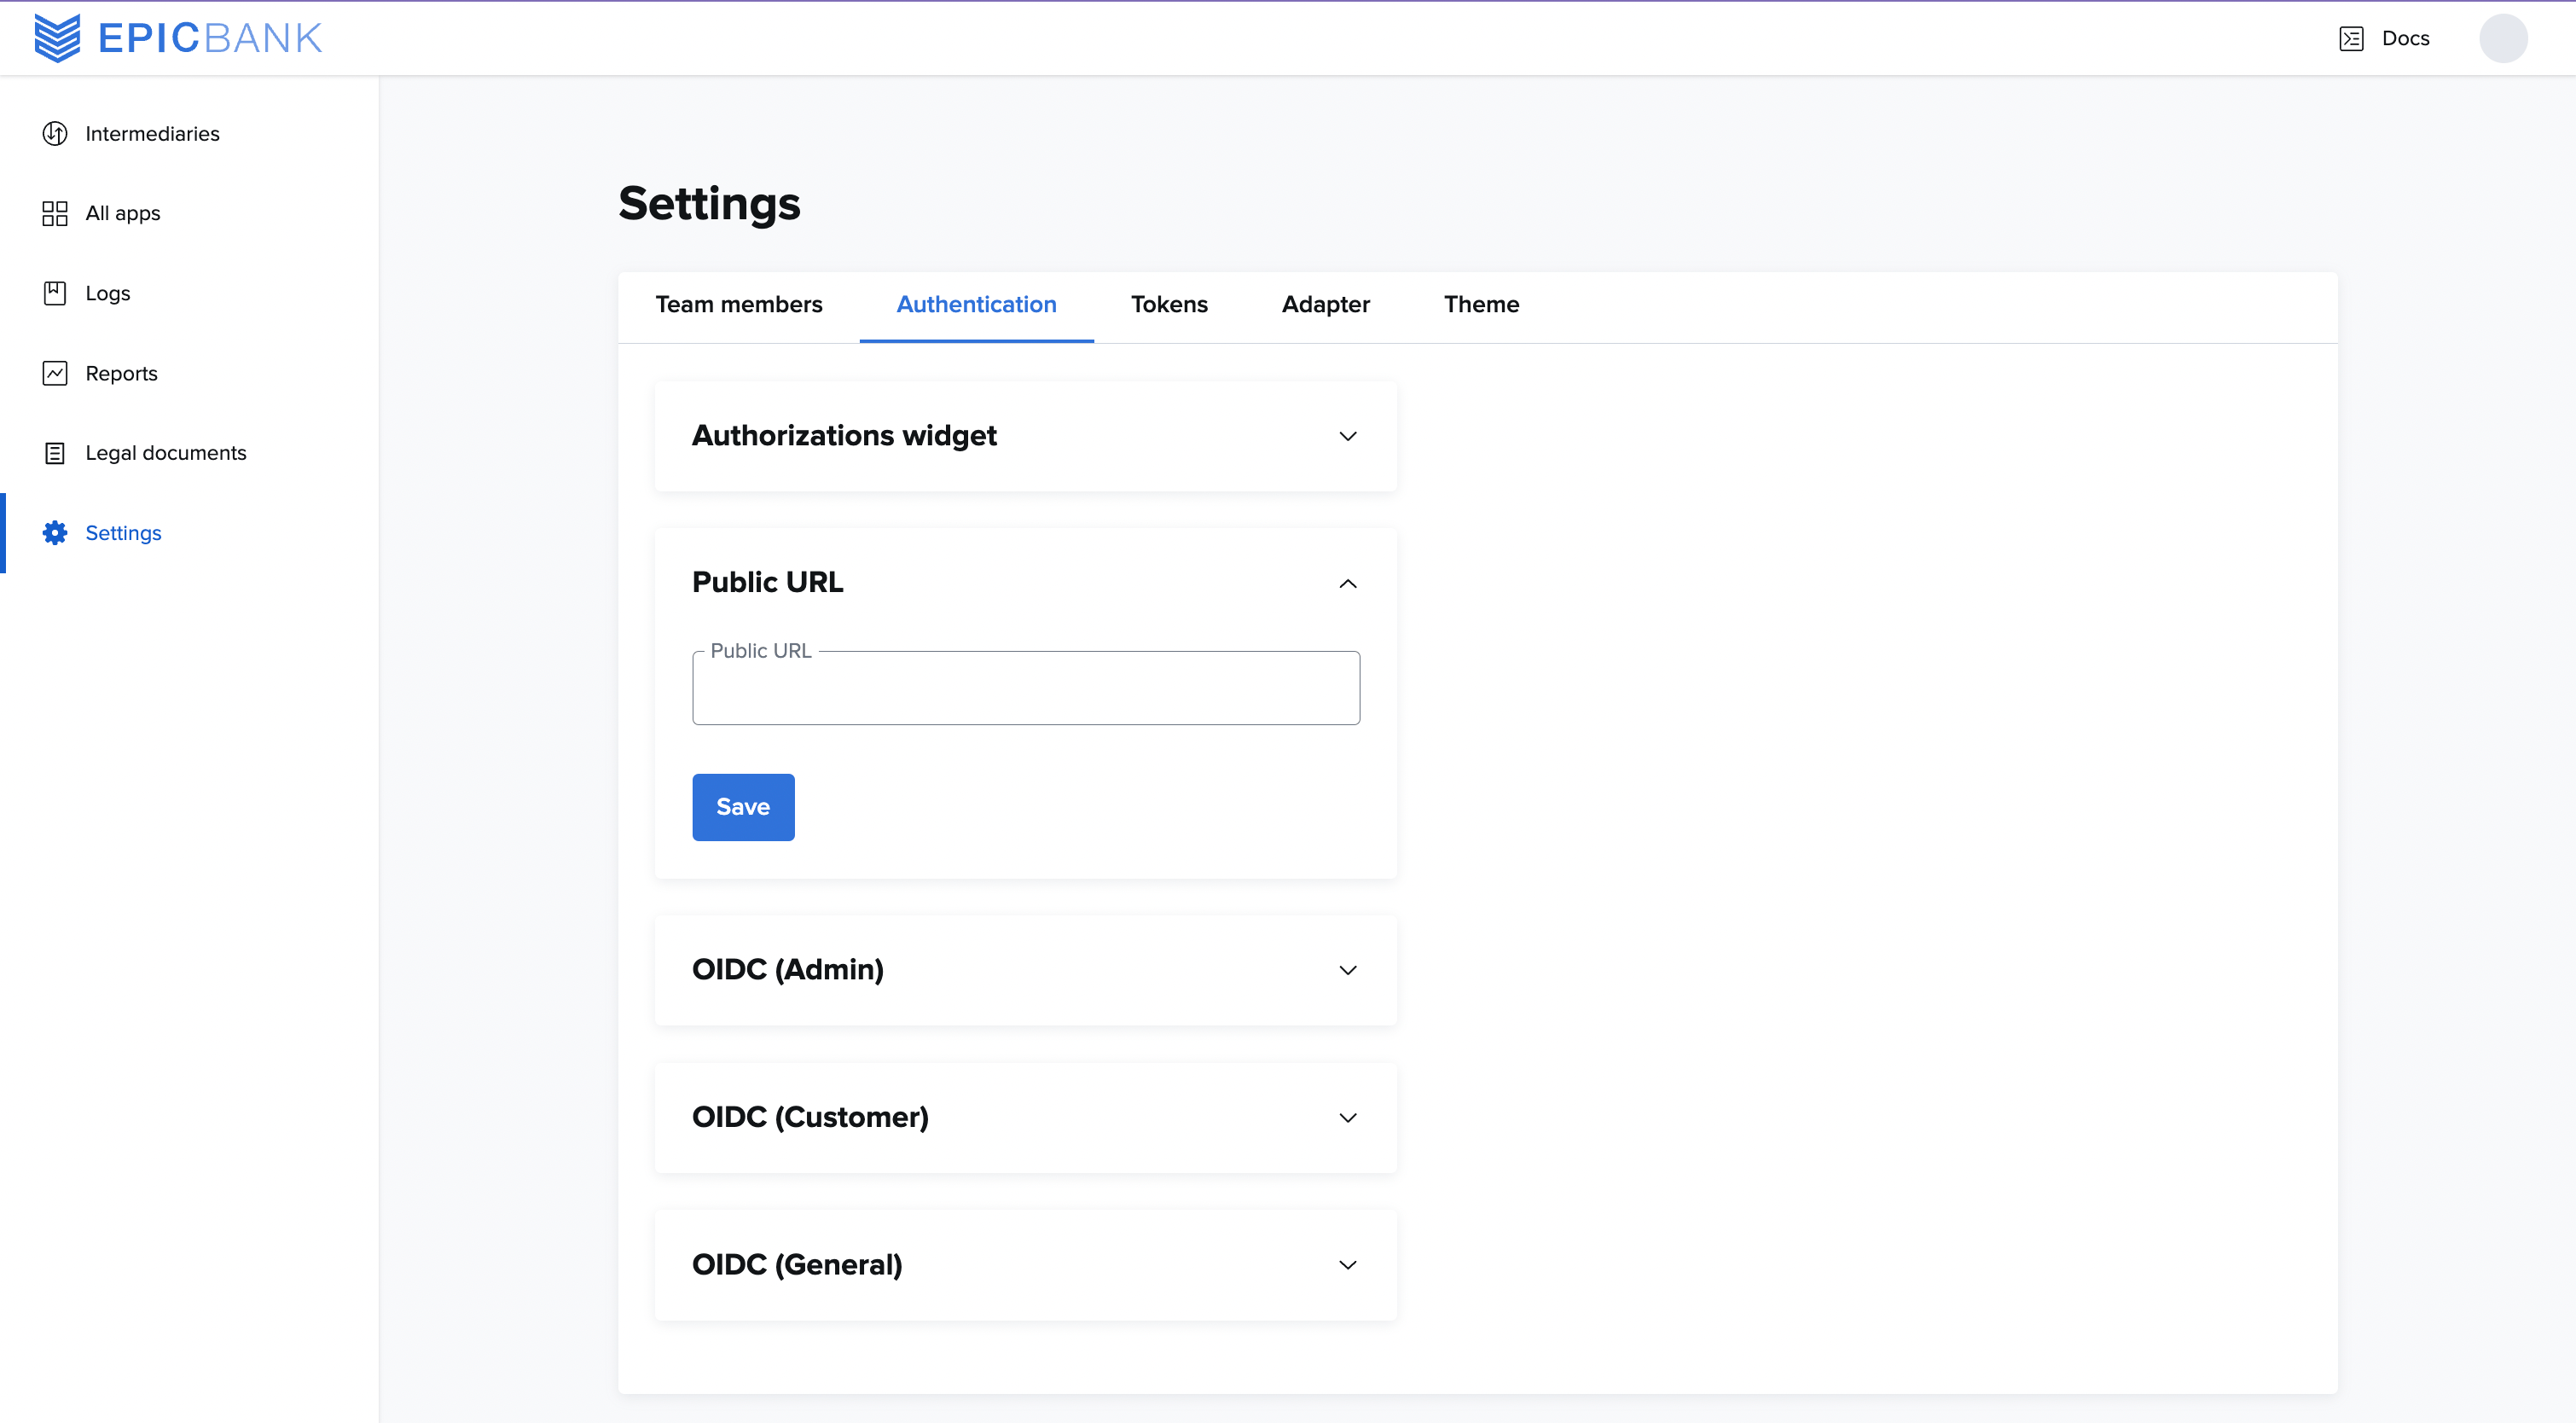
Any time this URL is changed, your DNS settings must be updated accordingly.
OIDC (Admin)
This is where the institution’s identity provider (IdP) information is given for employee authentication to the Data Provider Portal. A client ID, client secret, and discovery URI are required and must be obtained from your IdP. The rest of the fields are required only if the discovery URI is unavailable. Employee OIDC is optional, but recommended.OIDC (Customer)
This is where the institution’s identity provider (IdP) information is given for customer authentication. This is how end users authenticate to grant consent to share their data. A client ID, client secret, and discovery URI are required and must be obtained from the IdP and entered here. The rest of the fields are required only if the discovery URI is unavailable. Customer OIDC is required.OIDC (General)
- Disable OAuth OKCE code challenge: Set to
trueif PKCE isn’t available for your OIDC services. - OIDC Debug: Always set to
falseunless instructed otherwise by MX.