Partner-Managed Data
Overview
Rather than relying on our aggregation services to bring in your held account and transaction data, you can manage all that yourself — down to the last detail — with partner-managed resources.
This guide demonstrates the process of adding one of your held transactions using the Platform API. We’ll also outline best practices and cover common problems you might run into.
The MX Data Architecture
Every resource on the MX platform has to fit into our existing data architecture. For instance, every transaction belongs to an account, every account belongs to a member, and every member belongs to a user. So, before we can deal with the transactions we’re most interested in, we need to deal with users, members, and accounts — in that order.
Consider your ultimate use case is going to be. Each of these four resources (users, members, accounts, and transactions) have many attributes that you can set, but not all of those attributes will be useful for every case, and some of them depend on other attributes. So, you’ll need to know exactly what information you plan on sending to MX and how it’s going to fit into the product you’re building with the Platform API.
Workflow
Here’s a general workflow for creating your first transaction with held data:
- Create a
user(which represents your customer). - Create a
memberbelonging to thatuser(which represents the connection between the user and your special institution). - Create an
account(which represents the account the customer holds with you). - Create a
transaction(which represents any instance in which money moves into or out of your customer’s account).
Once all those resources exist, workflows are mostly about updating accounts and transactions to reflect the latest information — like increasing an account balance after a paycheck is deposited, or, for that matter, creating a new transaction to represent that deposited paycheck.
Create a User
A user represents your end user in the MX Platform. Make a request to the Create User endpoint (POST /users).
We recommend that you include a unique id of your choice with the request. You may also include metadata, such as the date the user was created or the end user's name. Don't include any sensitive information here, such as credentials.
None of these parameters are required, but the user object can't be empty. We recommend that you always set the id parameter when creating a user.
In the response, the API gives each new user an MX-defined guid (or user_guid when appearing outside the user object). Between your id and the guid, you can map between your system and ours. You'll need the user guid for nearly every request on the MX API, at least when using basic authorization.
Create a Managed Member
This endpoint lists the institutions that you are allowed to use for creating managed members. You’ll most likely have only one available institution, but you may have a use case that requires more; this is determined when enabling managed data with MX.
You shouldn’t need to perform this step often since your list of available institutions won’t often change. Feel free to work from a cached list.
Capture the institution_code that gets returned.
Now that we’ve got a user_guid and your institution_code, we can create a member. As with creating a user, MX strongly encourages you to give the member a unique ID so you can match the data on your systems with our systems.
If the request is successful, the response will contain the newly created member.
See the API reference for more detailed information on each parameter.
Create a Managed Account
Now we have a member, so it’s time to create an account.
Remember that a member represents the overall connection between your institution and the end user. So, if they open a new account with you, you don’t want to create a new member; you want to attach a new account to the member you just created. In other words, members can have multiple accounts, each one representing an account that user has with you: one for their savings account, another for their checking, another for their mortgage, etc.
See the API reference for more detailed information on each parameter.
Create a Managed Transaction
Now that you have a user, member, and account, you can create a transaction.
This example represents a deposit into a savings account.
See the API reference for more detailed information on each parameter.
Update a Managed Resource
You can now update the account you created so its balance reflects the deposit we just recorded by creating a new transaction. The account balance was $10,000 before, and you just deposited $400.
Delete a Managed Resource
Deletes on the MX platform cascade. If you delete a user, it deletes every member on that user, and every account on every member, and every transaction on every account. One delete on your end could mean thousands on our end.
If you need to make a lot of deletes that will result in a lot of cascades, reach out to MX.
Marking an account as closed or temporarily disabling a user might be better than deleting an account or user since you can still restore the data. But sometimes, deletes are necessary.
You won’t get a response body with a delete request. The status will be 204 No Content if it’s successful.
Pending and Posted Transactions
Because you are in full control of your held data with partner-managed resources, you are also responsible for reconciling pending and posted transactions. There are two different strategies for doing this:
- The ideal case: Keep the same transaction and update it from a status of
PENDINGto a status ofPOSTED. - The other case: Delete all
PENDINGtransactions and create entirely new transactions with a status ofPOSTED.
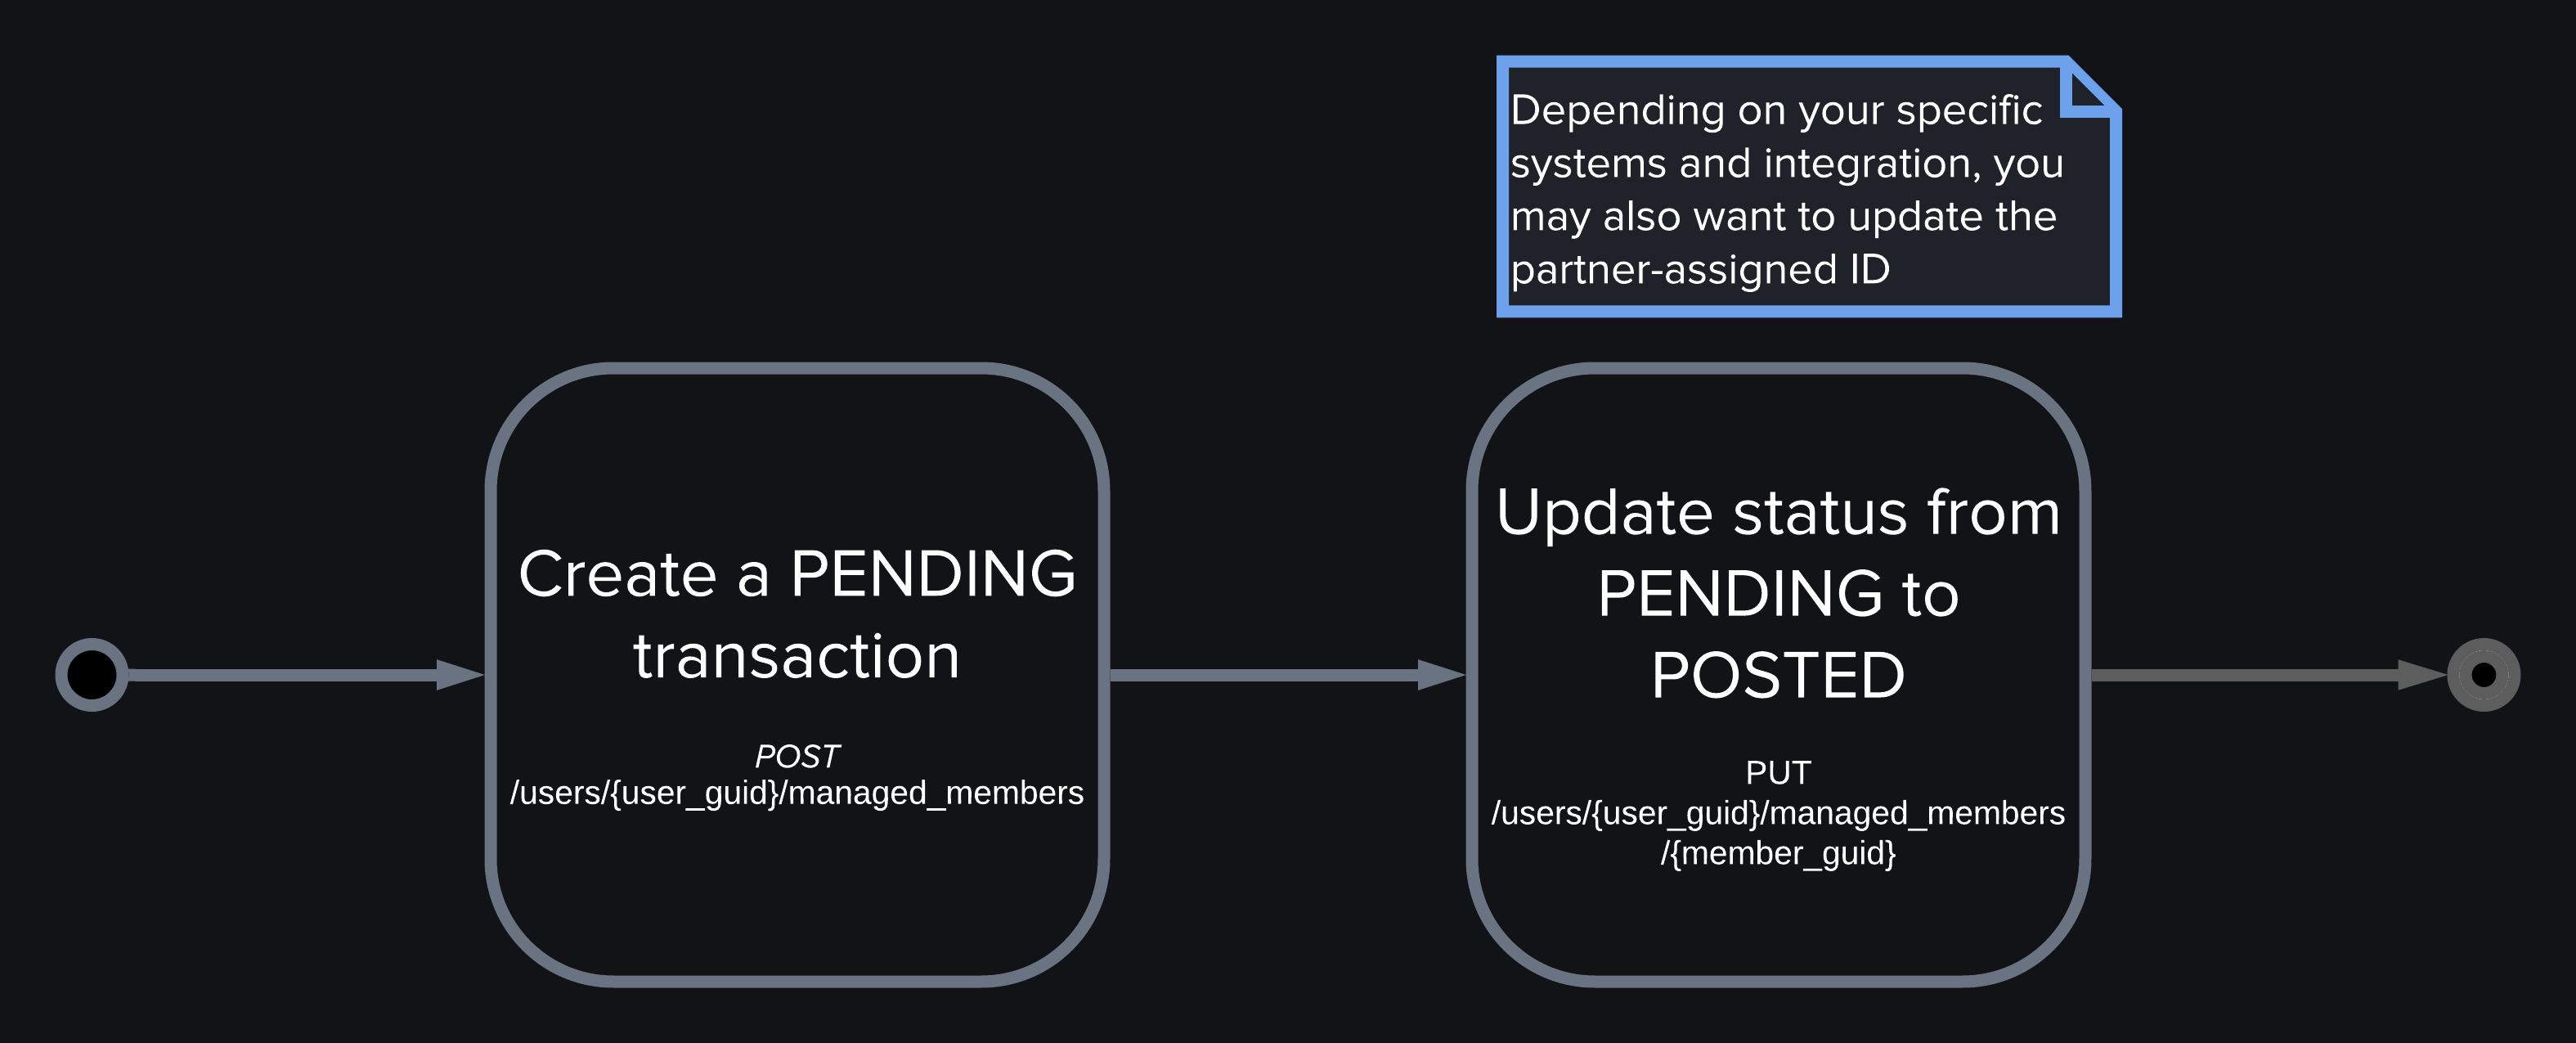
The Ideal Case
The best case scenario is to keep the existing Platform transaction and update it from PENDING to POSTED. This means the transaction will maintain the same GUID assigned by MX and ID assigned by you. If your systems use different IDs for associated pending/posted transactions, you’re free to update the ID in the Platform API as well.
This also means that if the end user has made any updates while the transaction was PENDING (like recategorizing it or changing the description), those end-user changes will be maintained.
If a PENDING transaction never becomes POSTED on your end, then you should delete the PENDING platform transaction.
This strategy only works if you can be absolutely certain on your own systems that the PENDING and POSTED transaction are the same. If you are unable to confidently tie the two transactions together, then you’ll need to use the second strategy.