- Add team members and set their role
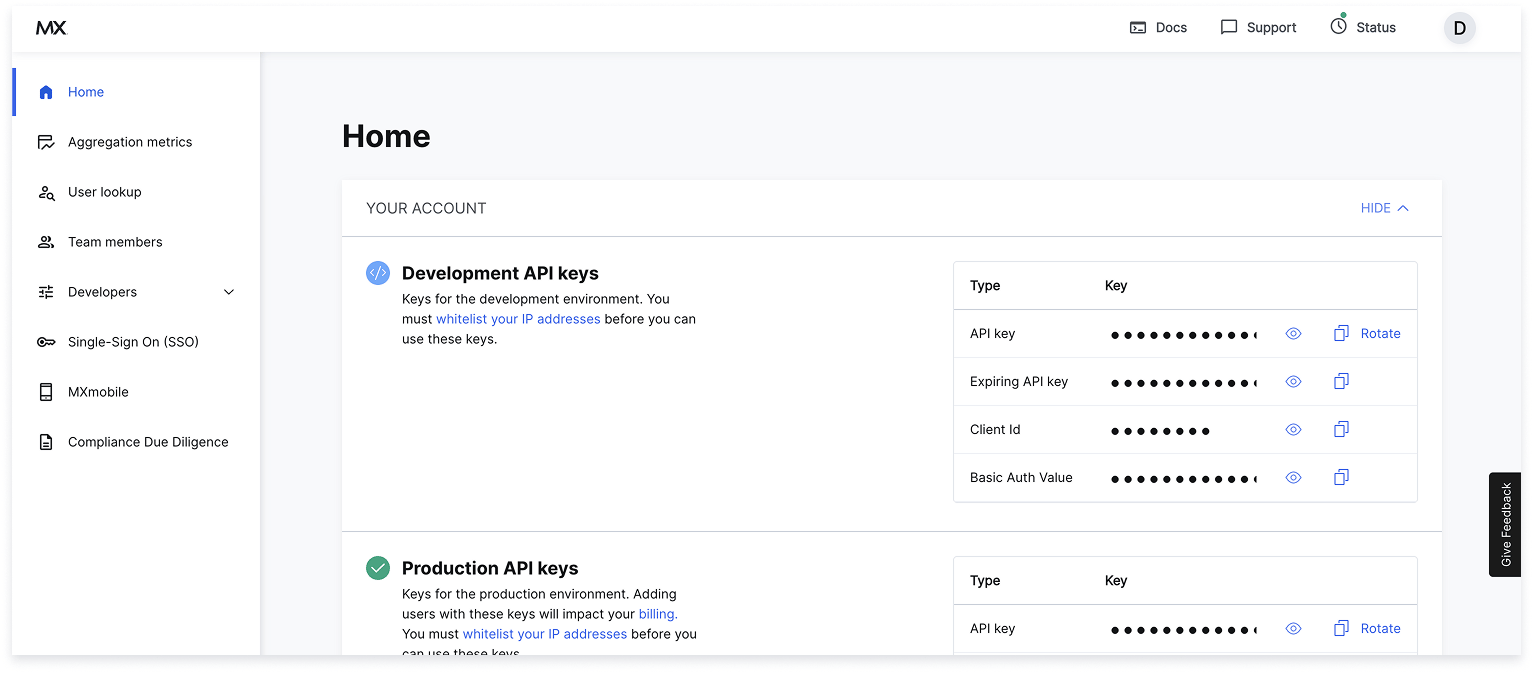
- View, copy, and rotate development & production API keys
- Whitelist IP addresses
- Register for OAuth
- Select Compliance Due Diligence to access security, compliance, and due diligence documents
SSO LOGINIf needed, you can set up an SSO SAML login for the Client Dashboard.
More Features
Aggregation Metrics
Compare your connection performance with MX’s platform-wide results.
User Lookup
View a user’s recent connection attempts and related events.
Maintenance Mode
Put your mobile app in maintenance mode to disable some/all its features.
Manage Webhooks
Create and manage webhooks to know when key events occur.
Add Team Members
To add new team members:- On the Home page, select the Add Team Members button or select Team members from the left-hand navigation. A list of team members appears.
- Select the + Add Team Members link at the top right. The Add team member window appears.
- Add the team member’s:
- First Name
- Last Name
- Role
ACCESS MANAGEMENT RESPONSIBILITYYou’re responsible for removing access for anyone no longer employed with your organization.
Aggregation Metrics
In the dashboard, Aggregation metrics shows aggregation-attempt results for financial institutions. Use it to compare your connection performance with MX’s platform-wide results. To view connection metric details for the highest-volume institutions on the MX platform:- Log in to Client Dashboard.
- Select Aggregation metrics.
- User and system errors
- Connection rates — your users compared with all MX clients and the selected institution.
Block an Institution
To block an institution or routing number:- In Client Dashboard, select Developers, then Blocks in the dropdown.
- Select either:
- Institutions to prevent end users from finding the institution in the institution search list.
- Routing Numbers to prevent end users from initiating microdeposits using that specific routing number.
- Depending on your previous selection, select either BLOCK INSTITUTION or BLOCK ROUTING NUMBERS.
- Enter the institution or routing number, then select BLOCK.
Register for OAuth
OAuth connections are tokenized connections that let one application interact with another without requiring users to re-enter credentials. Credentials are handled by the OAuth provider and exchanged for a token MX can use, providing a more secure connection for institutions and their customers. To register for OAuth in Client Dashboard:- In Client Dashboard, select Developers, then OAuth.
- Complete the OAuth registration form.
- Select Submit. MX will register your company for all OAuth-enabled connections.
- App logo — Must be a 100×100 px
.pngfile. - App name — Displayed to users; choose a recognizable name.
- Abbreviated app name — A shorter name for your app.
- App description — Brief summary of the app.
- Company website — Your company’s primary website.
- Street Address, City, State/Province/Region, Postal/Zip Code, Country — Your company’s address.
- Support email — The email address to contact your company’s support team.
- Support phone number — The phone number to contact your company’s support team.
- Support URL — The web address for your company’s support team.
Reset Your Password
To change your password:- On the Client Dashboard sign-in screen, select Forgot your password?
- Enter your email address, then select Request New Password. An email will be sent to the address provided.
- Open the email from MX and select Change my password. You’ll be taken to a webpage to set a new password.
- Enter your new password in the New Password field.
- Re-enter your password in the Confirm New Password field, then select Change My Password. If successful, you’ll be redirected back to the login page.
View Logs
In Client Dashboard, logs are available to help you test and troubleshoot API connections and issues. You can view logs for several of our APIs, including details about:- Webhooks and MX Platform statistics
- Total number of requests and their average duration.
INFOLogs displays logs from up to 7 days in the past in the production environment. To view logs for your integration environment, reach out to your MX representative.
- In Client Dashboard, select Developer to open the dropdown menu.
- Select Logs.
- Select a tab at the top of the table to view logs for that product.
- Select any table row to view the payload. The Log Payload panel opens on the right where you can see the call and response information that can help you identify connection issues.
Whitelist IP Addresses
All IP addresses that make calls to the Platform API, in any environment, must be whitelisted. Whitelisting ensures API calls come from approved, secure sources; calls from non‑whitelisted addresses are flagged as a security risk. Some addresses (for example, those originating outside North America) may require manual approval by MX.LIMITATIONS
- MX supports only IP addresses or IP ranges (not domains).
- Supported IP ranges are
/22through/32. - Dynamic IP addresses aren’t supported — only static IPs may be whitelisted.
- In Client Dashboard, go to the API Keys page. In the Whitelisted IP Addresses section you can view existing entries.
- Select + Whitelist IP address.
- Enter the new IP address or IP range. Separate multiple IP addresses with a comma.
- Select Confirm. Approved addresses are added to the list. Approval can take several days—contact MX if you need assistance.