

Workflow Diagram
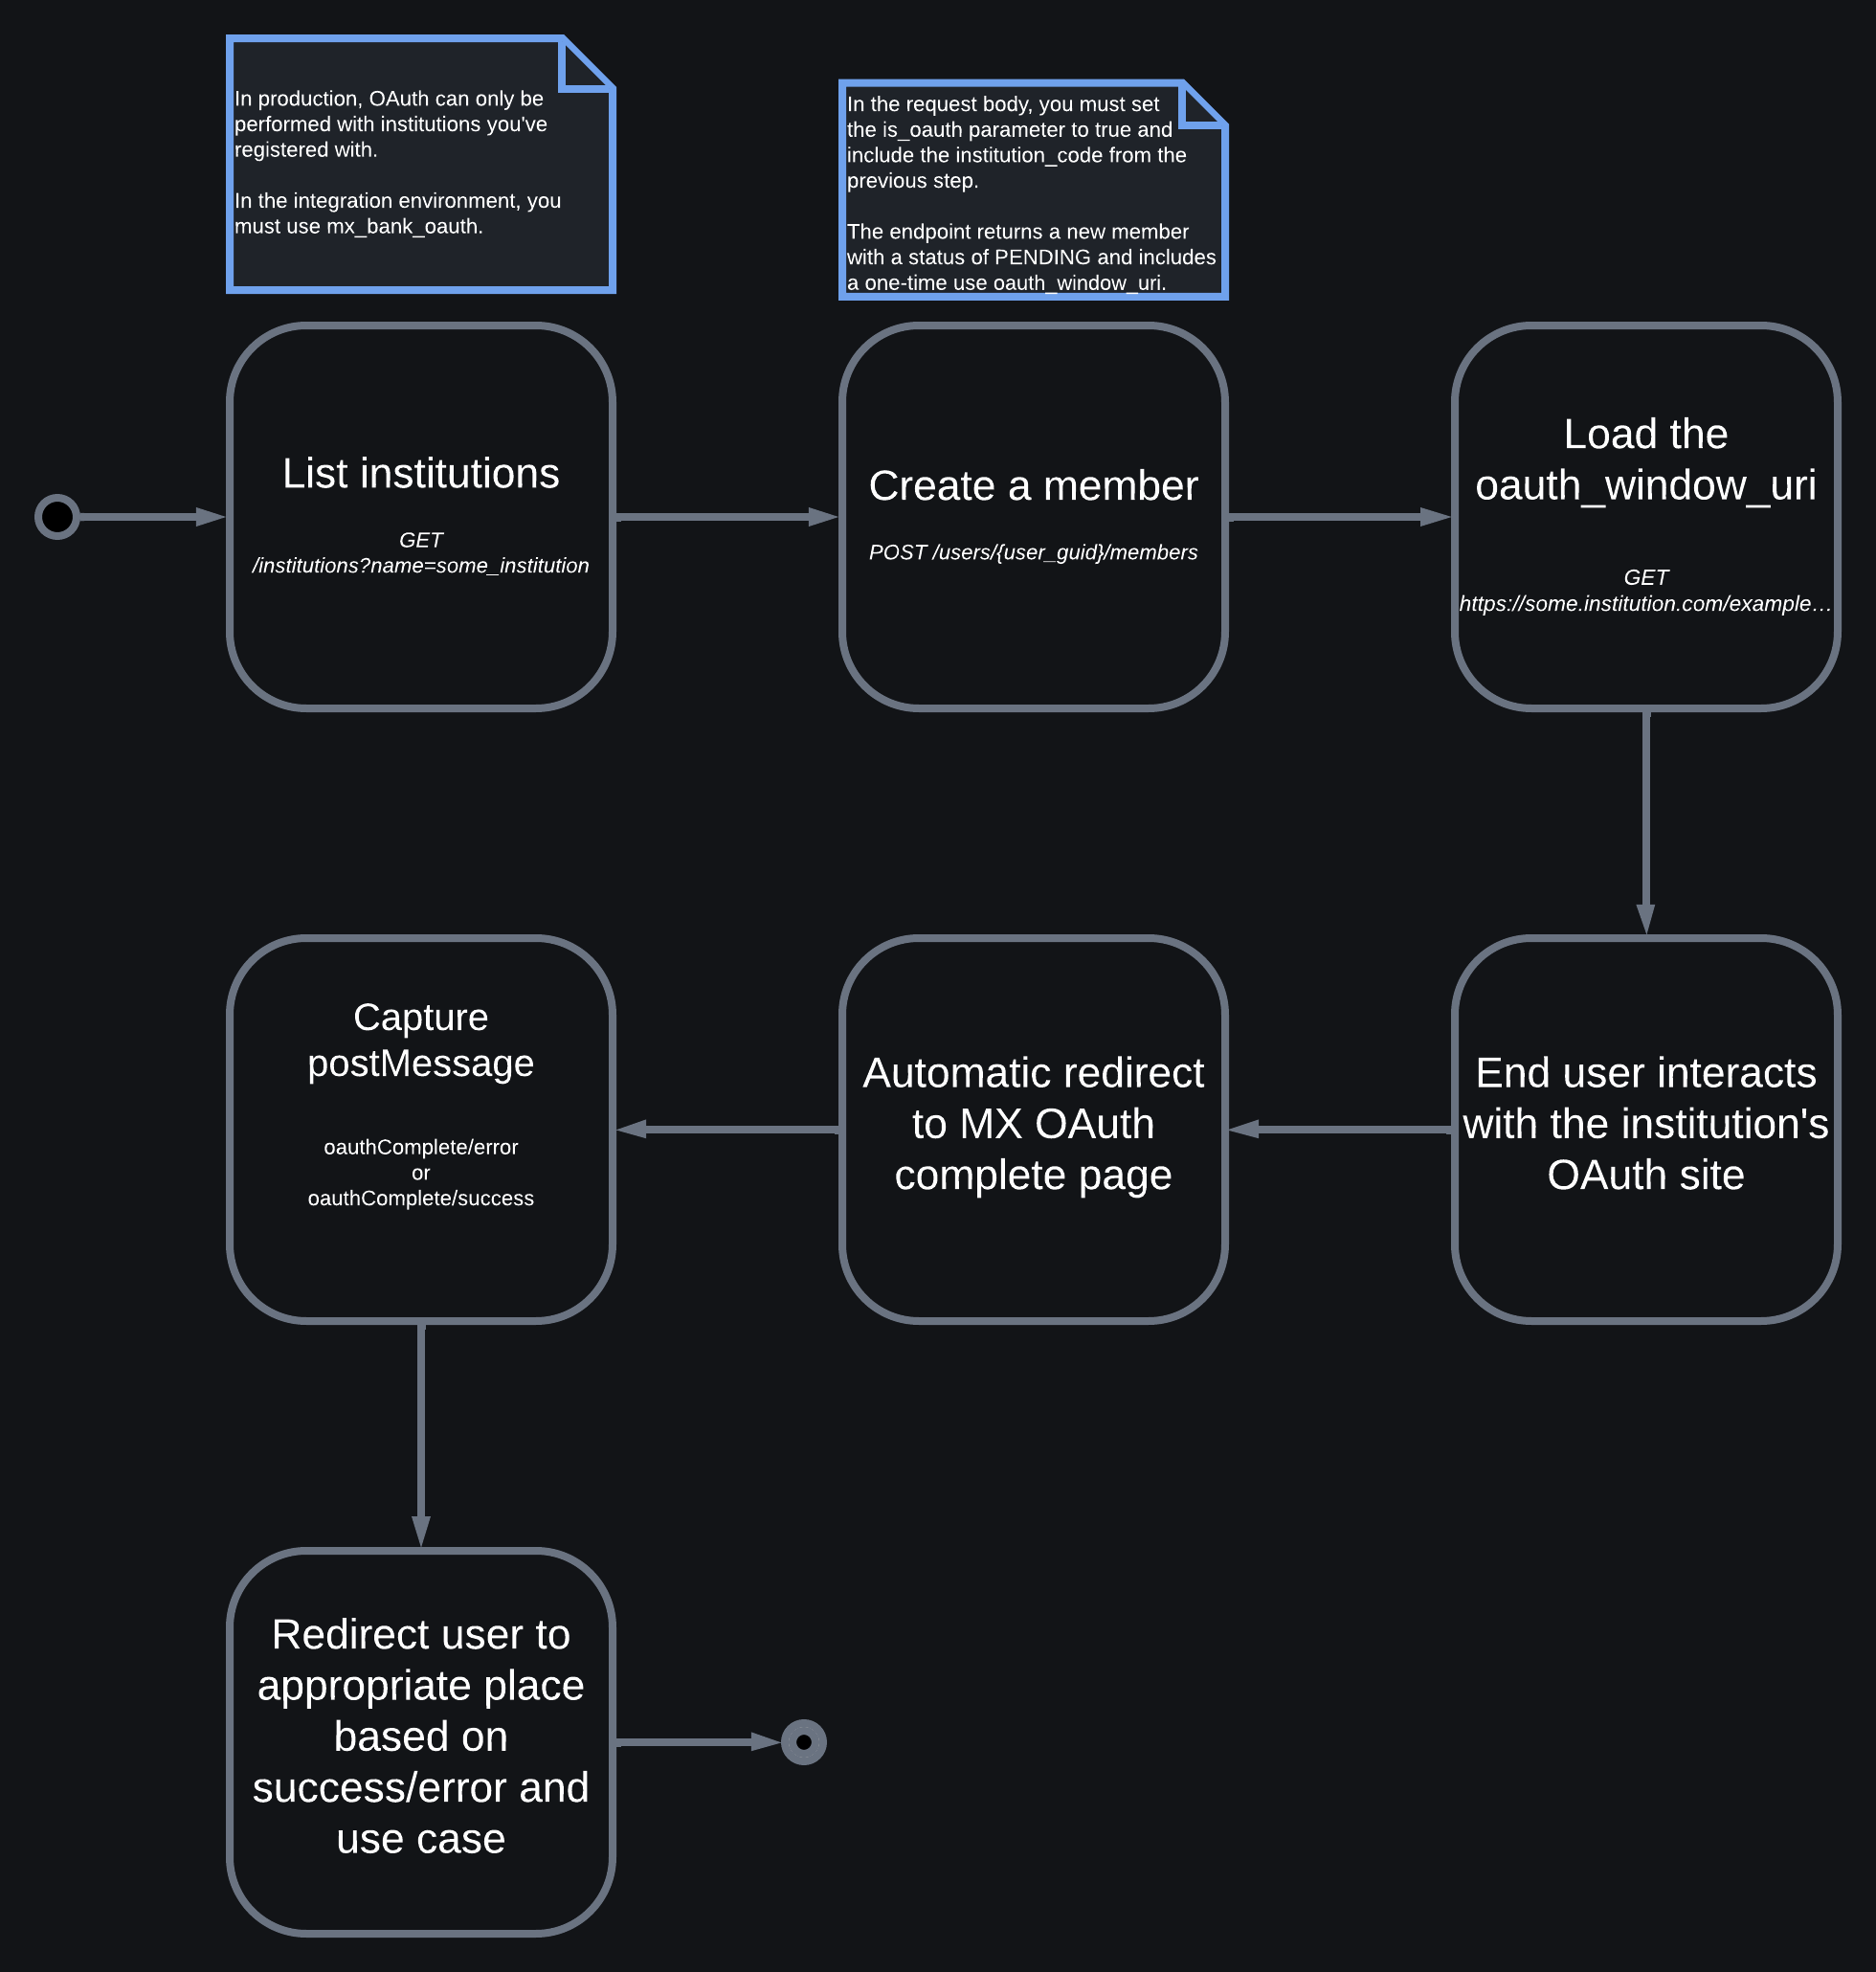
1
Create a Member
Now we’ll need to create an OAuth member, which you can do by setting the following:
"is_oauth": true.Also, we recommend that you always include a unique id when creating any resource on the Platform API so you can easily sync between your systems and ours.To specify which products aggregate after a successful OAuth connection, include the data_request.products parameter in your request.Endpoint: POST /users/{user_guid}/members2
Load the OAuth URI
Now that you have the
oauth.authorization_url from the last step, load it for the end user.Authorization URLs are one-time use. Don’t hard code an expected URI into your application. To get a new URL, use the create OAuth authorization URL endpoint (POST /users/{user_guid}/members/{member_guid}/oauth/authorization_url).Don’t prepend the https:// protocol to the URI string, as MX includes this.This is where the user will interact with the institution’s OAuth page and determine what data will be shared with MX and, therefore, with you.3
MX's OAuth Complete Page Loads
This process involves a redirect to an MX webpage whose function is to give the end user information about the end state of the OAuth process, and to deliver important success or failure postMessages.You must capture these postMessages, which will be one of the following:
OAuth Complete Error PostMessage
Triggered when the OAuth process has completed in an error state. TheoauthComplete/error message will be sent from the OAuth UI, and is used in API implementations.Error ReasonsJSON
OAuth Complete Success PostMessage
Triggers when the OAuth process has completed in a successful state.JSON